 Save
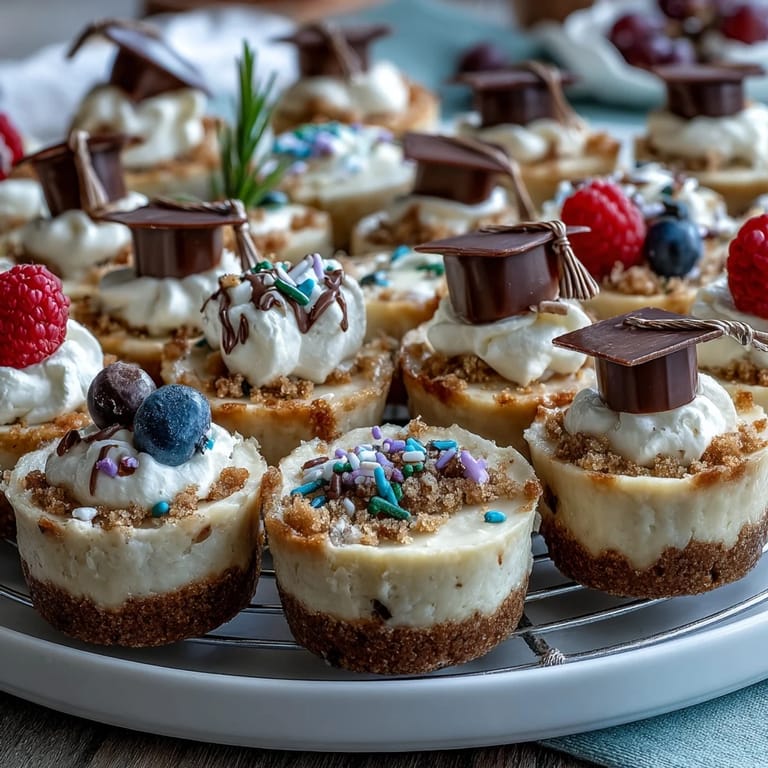
Save The first time the inviting aroma of warm cheesecake bites mingled with shouts of celebration in my kitchen, I could hardly believe such an easy treat could feel so festive. There’s something delightful about the gentle sizzle as mini cheesecakes cool on a wire rack while you sneak a sample, just to make sure they’re as creamy as promised. I remember doubling back to the counter, just to admire each glossy swirl of whipped cream and the little chocolate cap decorations perched on top. What began as an easy, last-minute dessert for a graduation party quickly became my new favorite excuse to celebrate with friends. Now, every batch feels like a tiny, edible trophy for making it through big moments—sweet, simple, and ready for confetti.
At my cousin’s graduation, these cheesecake bites practically vanished before people even tried the cake. I kept noticing folks drifting back to the platter, laughing about which graduation cap looked the most “authentic” while sneaking seconds. It made me realize how the ceremony is nice, but a table of homemade desserts can bring people together just as much. Someone even confessed they almost missed their group photo because the mini cheesecakes were too tempting to leave behind. There’s just something about tiny, celebratory treats that make every gathering a little more memorable.
Ingredients
- Graham cracker crumbs: Pressing these into the liners creates that classic, toasty base and I’ve found using pre-crushed crumbs saves so much cleanup.
- Granulated sugar: Mixing a bit into both the crust and filling helps balance richness and gives the crust a golden edge after baking.
- Unsalted butter: Melted, it turns crumbs into a buttery crust that holds its shape without getting soggy.
- Cream cheese: Letting it soften completely prevents lumps and gives you that lush, creamy bite everyone expects.
- Eggs: Add one at a time for a smooth batter—you’ll be rewarded with extra-silky cheesecake centers.
- Pure vanilla extract: A splash brings a subtle warmth that makes each bite taste bakery-fresh.
- Sour cream: It’s the not-so-secret ingredient for a tangy, lighter texture that never feels stodgy.
- Pinch of salt: Just a pinch sharpens the flavors and keeps everything balanced.
- Whipped cream & festive toppings: A crown of whipped cream and sprinkles or mini chocolate caps turns these into instant party starters.
- Fresh berries: A juicy garnish that pops against the creamy filling—especially pretty when you need a vibrant finishing touch.
Tired of Takeout? 🥡
Get 10 meals you can make faster than delivery arrives. Seriously.
One email. No spam. Unsubscribe anytime.
Instructions
- Get the pans ready:
- Preheat your oven to 325°F and line a 24-cup mini muffin tin with paper liners—this keeps cleanup a breeze.
- Mix and press the crust:
- Stir together the graham cracker crumbs, a bit of sugar, and melted butter in a bowl, then spoon about a tablespoon into each liner and press it down with your fingers or a spoon back until firm.
- Warm up the crusts:
- Bake the crusts for 5 minutes, then let them cool off on the counter while you whip up the filling—you’ll notice the buttery smell fill the kitchen already.
- Prepare the cheesecake filling:
- Beat the softened cream cheese until completely smooth, then add sugar and mix until fluffy; crack in the eggs one at a time, mixing just until combined, and finish with vanilla, sour cream, and a pinch of salt.
- Fill the cups:
- Spoon the cheesecake batter evenly into the prepared cups, filling nearly to the top for that satisfying, bakery-style look.
- Bake until just set:
- Slide the pan into the oven and bake for 13 to 15 minutes—they should wobble just a bit in the center, but don’t let the tops brown.
- Cool and chill:
- Let the cheesecakes cool in the tin for 10 minutes before transferring them to a wire rack; once they’re at room temperature, chill in the fridge for at least 30 minutes so they firm up and flavors meld.
- Add the party touches:
- Right before serving, top with swirls of whipped cream, piles of sprinkles, or mini chocolate caps for a cheeky graduation nod—fresh berries make them pop.
 Save
Save 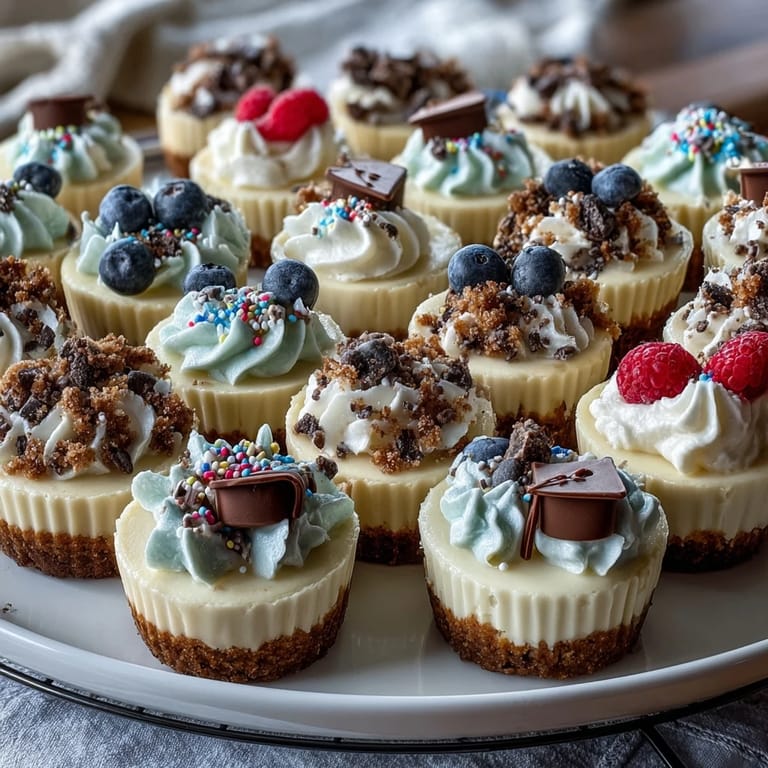 Save
Save There was this one party when a graduate’s mother came over and whispered that these little cheesecakes tasted just like her own grandma’s, except “somehow lighter and more fun.” She insisted on stealing a few for the car ride home. That felt like more than a compliment—like the bites themselves got to join the celebration. Sometimes dessert does what even the best speeches can’t: it turns a moment into a memory and a plate into a story. I’ll always think of that shy thank-you every time I pull these out of the fridge.
Decorating for Graduation is Half the Fun
One year, we got creative with tiny chocolate squares and licorice strips, assembling a whole parade of adorable cap toppers together at the table. The process was a bit of a mess—chocolate fingers everywhere—but everyone joined in, and the cheesecakes ended up looking surprisingly festive. The best part was seeing the pride in the graduates’ faces as they realized dessert was custom made to honor their big achievement. Even skeptical relatives couldn’t resist picking up the “caps” and marveling at the handiwork before popping them straight into their mouths. There’s a unique joy in making food look as fun as the occasion feels.
Making Ahead Takes Away the Stress
I learned quickly how much easier parties feel with desserts that can be prepped in advance. With these cheesecake bites, you can bake and chill the night before, then simply decorate at the last minute. Not having to fuss over the oven once guests arrive leaves time to actually clink glasses and share stories. It’s a game-changer for anyone who prefers to enjoy the moment rather than sweat over details. The only tricky part is making sure there’s still some left when the celebrating actually starts!
Adapting for Every Guest is Simple
After a few parties, I started experimenting with gluten-free cookie crumbs for friends with dietary restrictions—the results were just as delicious, and nobody felt left out. Swapping fruit for sprinkles or using dairy-free cream cheese opens up possibilities for almost every guest. I also noticed that the minis disappear faster when you add a dish of fresh berries right next to the platter. The freedom to change things up is what makes this recipe worth revisiting again and again.
- Always double-check for allergies right before serving.
- If making ahead, keep toppings separate until guests arrive.
- Chilling the bites overnight gives the best texture and flavor.
 Save
Save 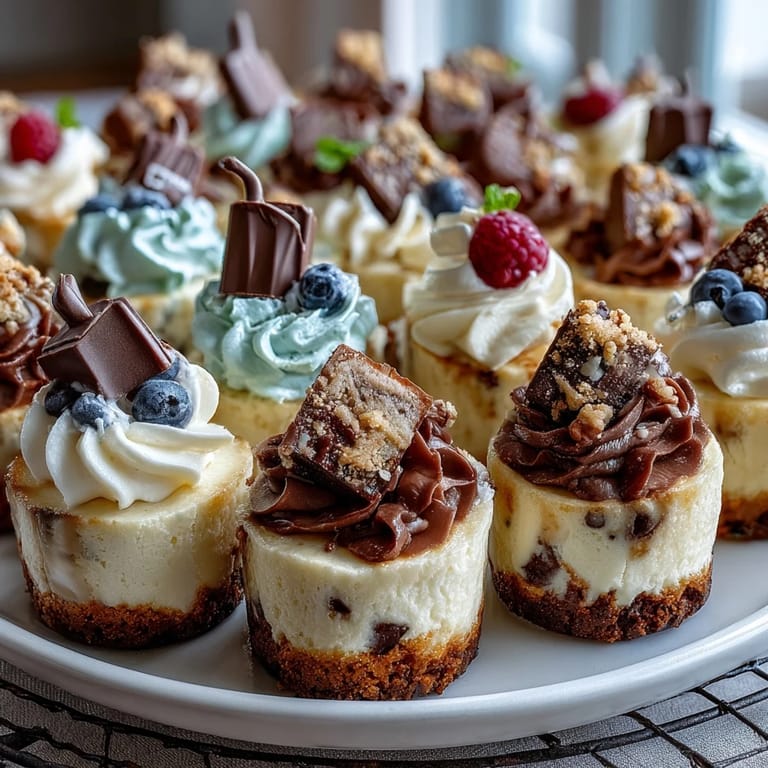 Save
Save Handing out these cheesecake bites at a party always feels like giving everyone their own small celebration. Here’s to sweet memories, simple moments, and desserts that make every milestone a little brighter.
Recipe FAQs
- → How firmly should I press the crust?
Press the graham mixture firmly into the liner using the back of a tablespoon or a small glass to compact it; a well-packed base helps the bites hold together after baking and chilling.
- → How can I tell when the centers are done?
Bake until the edges are set and the centers have a slight jiggle when you gently shake the pan; they will continue to firm as they cool and chill.
- → Can these be made ahead of time?
Yes. Chill the cooled bites for at least 30 minutes or up to 24 hours. Add whipped cream and delicate decorations just before serving to keep toppings fresh.
- → Any tips to avoid cracks or curdling in the filling?
Beat cream cheese until smooth before adding sugar, then mix eggs in one at a time without overbeating. Avoid high oven temperatures and overbaking to prevent cracking.
- → What can I use instead of sour cream?
Plain Greek yogurt is a good substitute for sour cream; it adds tang and keeps the filling creamy while reducing richness slightly.
- → How do I make a gluten-free version?
Swap graham crumbs for certified gluten-free cookie or oat crumbs and confirm all labels for cross-contact; press and bake the crust the same way.