 Save
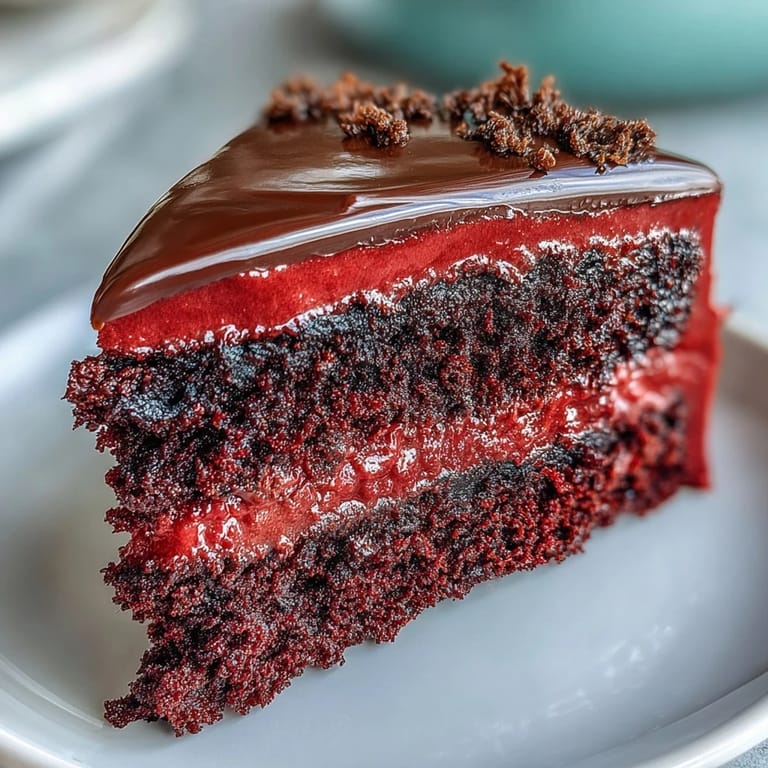
Save My sister called me on a Tuesday night, asking if I could bake something bold for her vintage cartoon-themed party. She wanted red velvet, but with a twist, something that could hold a chocolate Betty Boop cutout without looking like a kindergarten craft project. I said yes before I even knew how I'd pull it off. The next morning, I stood in my kitchen with gel food coloring in one hand and a printed silhouette in the other, hoping the chocolate would cooperate. It did, and that cake became the centerpiece everyone remembered.
I remember frosting the first layer in my kitchen at midnight, the house quiet except for the hum of the fridge. My hands were covered in cream cheese frosting, and I kept smoothing the sides with my offset spatula, trying to get that bakery-smooth finish I'd seen online. When I finally pressed the chocolate Betty Boop silhouette onto the top, it felt like the whole cake came to life. My sister cried when she saw it, not because it was perfect, but because it was exactly what she had imagined.
Ingredients
- Cake flour: Sifted cake flour creates that tender, fine crumb that makes red velvet feel like velvet, and I always sift twice to avoid any lumps.
- Natural unsweetened cocoa powder: Just enough to add depth without turning this into chocolate cake, and it plays beautifully with the red color.
- Baking powder and baking soda: The baking soda reacts with the vinegar to give the cake its signature lift and airy texture.
- Fine sea salt: A small amount balances the sweetness and sharpens every other flavor in the batter.
- Unsalted butter: Room temperature butter creams smoothly with the sugar, and I always leave mine on the counter for at least an hour before starting.
- Granulated sugar: Creaming it with butter creates air pockets that make the cake light and soft.
- Large eggs: Room temperature eggs blend into the batter without deflating it, and I set mine out when I preheat the oven.
- Buttermilk: The acidity tenderizes the crumb and adds a subtle tang that keeps the cake from tasting flat.
- Red gel food coloring: Gel is the only way to get that vibrant red without watering down the batter, and I use just enough to make it bold.
- Pure vanilla extract: It rounds out the flavor and makes the whole cake smell like a bakery.
- White vinegar: This activates the baking soda and adds a tiny bit of acidity that enhances the red color.
- Cream cheese: Room temperature cream cheese whips into the frosting without lumps, and I always use full-fat for the richest flavor.
- Powdered sugar: Sifted powdered sugar makes the frosting silky and prevents any gritty texture.
- Dark chocolate or candy melts: Dark chocolate sets firm and snaps cleanly, making it perfect for a delicate silhouette that holds its shape on top of the frosting.
Tired of Takeout? 🥡
Get 10 meals you can make faster than delivery arrives. Seriously.
One email. No spam. Unsubscribe anytime.
Instructions
- Prep the pans:
- Preheat your oven to 350°F and grease two heart-shaped pans, then line the bottoms with parchment so the cakes release cleanly. I learned this the hard way after losing half a cake to a stubborn pan.
- Mix the dry ingredients:
- Whisk together the cake flour, cocoa powder, baking powder, baking soda, and sea salt in a medium bowl, then set it aside. This step ensures every bite has even flavor and rise.
- Cream the butter and sugar:
- Beat the room temperature butter in your stand mixer for about a minute, then gradually add the sugar and continue beating for 2 to 3 minutes until the mixture looks pale and fluffy. This is where the cake gets its lightness, so do not rush it.
- Add the eggs:
- Add the eggs one at a time, beating on low after each addition just until blended, and scrape down the bowl sides as needed. Overmixing here can make the cake dense.
- Color and flavor the batter:
- Stir in the red gel food coloring, vanilla extract, and white vinegar until the batter is evenly colored and smells amazing. The color should be bold and bright, not pale or streaky.
- Alternate wet and dry:
- With the mixer on low, add one-third of the dry ingredients, then half of the buttermilk, mixing just until incorporated, and repeat until everything is combined. This technique keeps the batter tender and prevents overmixing.
- Activate the baking soda:
- In a small cup, combine 1 teaspoon vinegar with baking soda, then gently fold it into the batter, watching it foam slightly. This reaction creates air pockets that make the crumb light and soft.
- Bake the cakes:
- Divide the batter evenly between the prepared pans, smooth the tops with an offset spatula, and bake on the center rack for 25 to 30 minutes. A toothpick inserted in the center should come out clean, with just a few moist crumbs.
- Cool completely:
- Let the cakes cool in the pans for 10 minutes, then run a thin knife around the edges, invert onto wire racks, and remove the parchment. Cool them completely before frosting, or the frosting will melt and slide off.
- Make the frosting:
- Beat the room temperature cream cheese and butter in a clean mixer bowl for 2 minutes until smooth, then gradually add the sifted powdered sugar, a pinch of salt, and vanilla extract. The frosting should be fluffy and spreadable, not stiff or runny.
- Assemble the layers:
- Level the cake domes with a serrated knife if needed, then place one heart layer on a cake board and pipe or spread about three-quarters of a cup of frosting over the top. Top with the second layer, press gently, and refrigerate for 15 minutes to set the crumb coat.
- Frost the cake:
- Apply a thin crumb coat of frosting over the entire cake, chill for another 10 minutes, then add a final smooth layer of frosting using an offset spatula. You can create swirls or leave it smooth, depending on your style.
- Create the chocolate silhouette:
- Place the printed Betty Boop stencil under a sheet of parchment, then pipe or brush melted dark chocolate over the outline on the parchment. Let the chocolate set completely at room temperature or in the fridge for 10 minutes before peeling it off.
- Add the decoration:
- Carefully lift the chocolate silhouette from the parchment and place it onto the center of the cake, pressing gently so it adheres to the frosting. Handle it gently because chocolate can be fragile once set.
- Final touches:
- Decorate the cake edges with additional frosting rosettes, edible glitter, or red sugar pearls, then chill the cake for 30 minutes before serving. Slice with a warm, clean knife for neat heart-shaped pieces.
 Save
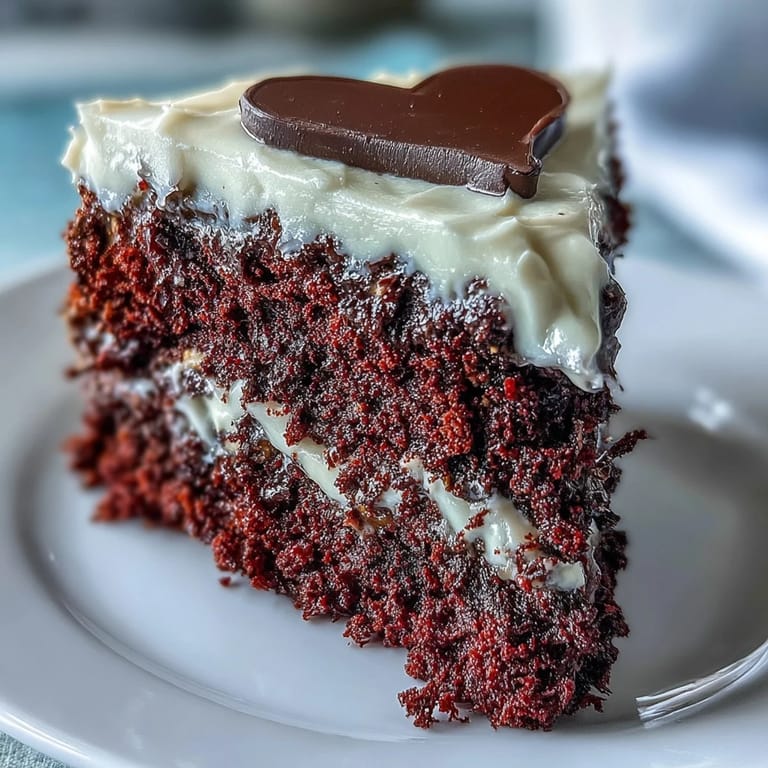
Save The morning after the party, my sister sent me a photo of the last slice on a paper plate, the chocolate Betty Boop still intact. She said her friends had argued over who got to keep the silhouette, and someone had carefully wrapped it in foil to take home. That is when I realized this cake was not just about the flavor or the frosting, it was about creating something people wanted to hold onto.
Choosing Your Chocolate
I have made the silhouette with both dark chocolate and candy melts, and each has its strengths. Dark chocolate snaps cleanly and has that bittersweet edge that balances the sweetness of the frosting, but it can be a little temperamental if your kitchen is too warm. Candy melts are easier to work with and set faster, but they lack the depth of flavor that real chocolate brings. If you are new to chocolate work, start with candy melts, and once you are comfortable, try dark chocolate for a more sophisticated finish.
Getting the Frosting Just Right
The secret to smooth cream cheese frosting is patience and temperature. If your cream cheese or butter is too cold, the frosting will be lumpy no matter how long you beat it, and if they are too warm, the frosting will be runny and slide off the cake. I always leave both on the counter for at least an hour before I start, and I beat them together for a full two minutes before adding the powdered sugar. If the frosting feels too thick, I add a teaspoon of milk at a time until it reaches the perfect spreadable consistency.
Storing and Serving
This cake keeps beautifully in the fridge for up to four days, and I always store it in an airtight container to prevent the frosting from picking up any fridge smells. The chocolate silhouette stays crisp as long as the cake is kept cold, and I have even made it a day ahead and stored it flat in the fridge until I was ready to assemble. When you are ready to serve, let the cake sit at room temperature for about 20 minutes so the frosting softens slightly and the flavors come alive.
- Use a warm knife to slice through the cake cleanly, wiping it between cuts for neat heart shapes.
- If you are transporting the cake, chill it thoroughly so the frosting sets firm and the silhouette does not shift.
- Leftover slices freeze well wrapped tightly in plastic wrap, and they thaw beautifully in the fridge overnight.
 Save
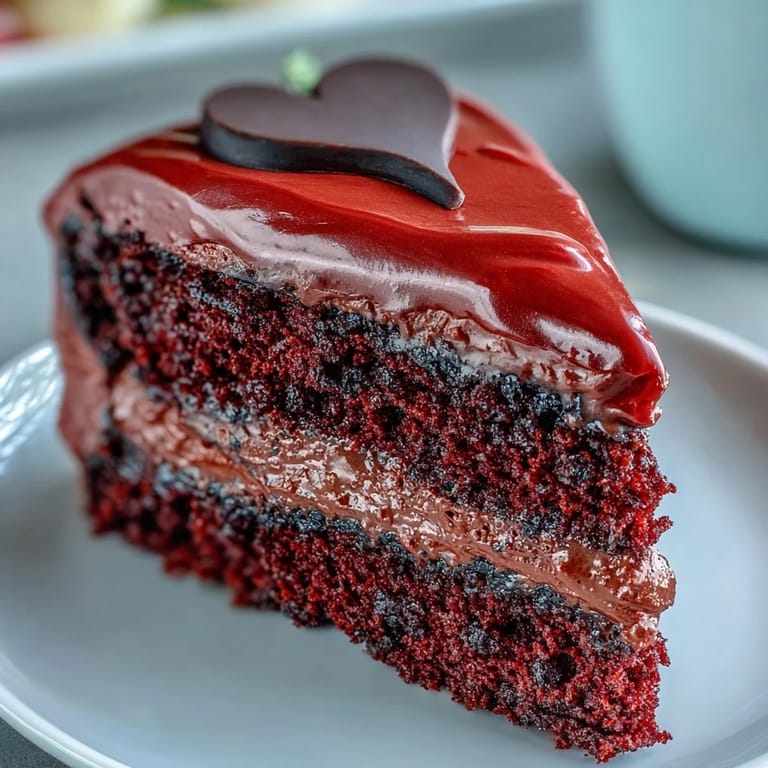
Save Every time I make this cake, I think about that midnight frosting session and how something so simple turned into a memory my sister still talks about. It is funny how a little chocolate and a lot of care can turn a cake into a story.
Recipe FAQs
- → How do I achieve the vibrant red color?
Use gel-based food coloring instead of liquid varieties. Gel coloring provides concentrated pigment without adding excess moisture to your batter, which could affect the texture and rise of your cake layers.
- → Can I make the chocolate silhouette ahead of time?
Absolutely. Prepare your dark chocolate silhouettes up to a week in advance and store them between sheets of parchment paper in an airtight container at room temperature. Keep away from heat sources and direct sunlight.
- → Why is vinegar added to the batter?
The vinegar activates the baking soda, creating tiny bubbles that result in a lighter, more tender crumb. It also enhances the red color development and provides a subtle tang that complements the cream cheese frosting beautifully.
- → How should I store the finished cake?
Keep refrigerated in an airtight cake container or cover loosely with plastic wrap. The cream cheese frosting requires cool temperatures to maintain stability. Bring to room temperature for 30 minutes before serving for the best texture and flavor.
- → Can I use regular cocoa powder instead of natural?
Natural cocoa powder works best here as it provides the subtle chocolate undertones without overpowering the delicate vanilla-red velvet profile. Dutch-processed cocoa would alter the acidity balance and may affect how the baking soda activates.